

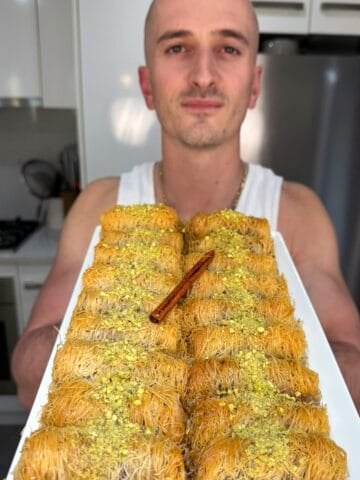
This easy Greek baklava rolls recipe, known as Saragli, is one of the best bite-sized desserts around and much easier than the traditional style! This version of rolled baklava is the perfect mix of crispy, buttery layers of phyllo dough filled with spiced nuts and soaked in a fragrant honey syrup.

If you love this dessert, be sure to check out my traditional baklava recipe for the classic version of this sweet treat. For a showstopping twist, don’t miss my baklava cheesecake recipe. And if you’re after something even simpler, I highly recommend my no-bake mosaiko recipe for a quick and delicious Greek treat!
Jump to:
Why you will love this recipe
- Rich, Nutty Flavour: This Greek baklava rolls recipe is loaded with crushed almonds, walnuts, and pistachios. Every bite is filled with nutty flavour and satisfying crunch. This mix of nuts makes the dessert extra tasty.
- Warm Spices: Ground cinnamon and ground clove add a cosy, warm flavour to the filling. They’re the perfect match for the sweet honey syrup.
- Quick and Easy to Make: This rolled baklava version is so simple to prepare, that you can enjoy a traditional Greek treat without spending hours in the kitchen.
- Beautiful on the Plate: With their golden, flaky layers, these bite-sized "cigar shaped" desserts look amazing. They’re perfect for impressing guests, just like my Greek kataifi rolls recipe which has a similar shape but uses shredded pastry.

Overview of the key steps
Here’s a quick look at the steps to make 30 delicious Greek baklava rolls. Making different shapes like this is much easier than the traditional layered baklava!
- Make the Syrup: Start by boiling sugar, water, lemon juice, and spices, then set it aside to cool.
- Prepare the Nut Mixture: Blend pistachios, walnuts, and almonds with warm spices.
- Assemble the Rolls: Layer the phyllo sheets with butter, add the nut filling, and roll them up.
- Bake and Add Syrup: Bake the rolls until they’re golden brown, then pour the cooled syrup over the hot baklava for perfect flavour.
Watch the short video tutorial
Watch the video below to see just how easy it is to make one of the best Greek phyllo desserts! It’s perfect for sharing with friends and family!

Don’t forget to like, comment, and share the video with anyone who would love this recipe!
Ingredients
Let’s take a closer look at what makes this recipe so special! As always, check the recipe card below for precise quantities.
Syrup Ingredients

- Sugar & Honey: This combo adds the perfect sweetness! The honey gives the syrup a richer, deeper flavour that makes all the difference.
- Lemon Juice: Fresh lemon juice brightens up the syrup and balances the sweetness. It’s a small touch, but it brings everything together.
- Cinnamon Stick & Cloves: Whole spices like cinnamon and ground cloves give the syrup a warm, aromatic base that’s perfect for this dessert.
- Water: Water is the base of the syrup, letting all the other ingredients blend into a sweet, fragrant syrup.
Note: Many people enjoy adding a splash of orange blossom water or rose water for a touch of floral aroma. You can experiment with these if you like!
Nut mixture

- Pistachios, Almonds & Walnuts: A mix of crushed pistachios, almonds, and walnuts gives the filling a nutty flavour and crunchy texture. I like to grind them in a food processor until they’re in small pieces, but not too fine so you still get some texture in every bite.
- Ground Cinnamon & Cloves: A dash of cinnamon and cloves adds a warm, cosy spice to the filling. This spice mix is a classic in Greek desserts!
- Raw Sugar: Just a touch of raw sugar adds a hint of sweetness and helps balance the flavours in the nut mixture.
Phyllo Pastry & Butter

- Phyllo Dough Sheets: The phyllo dough is the foundation of this dessert! We don’t use puff pastry here, as phyllo sheets create the light, crispy layers that make these rolls so special. Make sure the sheets are fresh or fully thawed so they’re easy to handle.
- Melted Butter: Brushing each phyllo sheet with melted butter gives the rolls a crispy, golden layer and a rich flavour. Don’t skip this step, as it’s the key to those perfect flaky layers!
Preparation
I love getting everything ready in advance to make the cooking process go as smoothly as possible, especially if this is your first time making these. Here’s what you need to get set up for success!
- Clean Work Surface: Start with a large kitchen counter or clean workspace. This gives you plenty of room to layer and roll the phyllo sheets.
- Small Pot for Butter: Melt the butter in a small pot and keep it close by while working with the phyllo sheets.
- Large Bowl for Nut Mixture: Use a large bowl to mix the crushed nuts with spices. Prepare this mixture ahead of time so you’re ready to assemble.
- Food Processor or Pestle & Mortar: Crush the nuts to your desired texture with a food processor, or use a pestle and mortar if you prefer crushing by hand for a more rustic feel.
- Damp Kitchen Towel: Use a clean, damp kitchen towel to cover the phyllo sheets while you work to prevent them from drying out.
- Pastry Brush & Wooden Skewers: Have a pastry brush for applying melted butter and wooden skewers (souvlaki sticks) for rolling and shaping the baklava rolls.
- Sharp Knife: Use a serrated knife (with small teeth) for easily cutting the rolled baklava into portions before baking.
- Baking Dish: I use a 23cm by 30cm baking dish and it works well. If your dish size is different, ensure that the rolled baklava sits snugly, side by side, so they bake evenly. There’s no need for a baking sheet.
Step-by-step Instructions
Follow these steps to bring these Greek baklava rolls to life! Use the images as a guide, and if you need extra help, watch my video for detailed, step-by-step guidance on the cooking process.
Syrup Preparation

- Combine Ingredients: In a medium saucepan, add the sugar, water, lemon juice, a cinnamon stick, cloves, and honey. This combination creates a simple syrup that's fragrant and brings sweetness and balance to your baklava rolls.
- Bring to a Boil: Place the saucepan over medium heat, stirring occasionally, and allow the mixture to come to a gentle boil. Once it starts boiling, continue for 1 minute to ensure the sugar dissolves completely and the spices infuse into the syrup.
- Cool Completely: Turn off the heat and set the syrup aside to cool. This step is important, as pouring cold syrup over the hot baklava rolls later on gives them the perfect texture and flavour.
Nut mixture

- Crush the Nuts: Using a blender, food processor, or pestle and mortar, crush the almonds, walnuts, and pistachios into small pieces, but keep a bit of texture.
- Mix with Spices: In a large bowl, combine the crushed nuts with ground cinnamon, ground cloves, and raw sugar. Stir everything together until evenly mixed. The spices add warmth and an aromatic touch that really complements the sweet syrup. Set the mixture aside and ready for assembly.
Assembling the Saragli (Rolls)

- Preheat the Oven: Set your oven to a high heat of 200°C (fan-forced) so it’s ready to bake once you finish assembling the rolls.
- Prepare the Baking Dish: Butter the bottom and sides of your 23 cm by 30 cm baking pan/ dish. The butter prevents sticking and adds a rich flavour to the bottom of the baklava rolls.
- Layer the Phyllo Sheets: Place one sheet of phyllo dough on a clean working surface and brush it lightly with melted butter. Add a second sheet on top and brush again with butter. This layering gives the phyllo a delicious, flaky texture.
- Add the Nut Mixture: Sprinkle a few handfuls of the prepared nut mixture evenly over the phyllo sheet. Avoid overloading it, a thin layer of nuts is just right to keep the rolls easy to shape.
- Fold and Place the Skewers: Fold the bottom edge of the phyllo up about 5 cm to create a straight edge. Place two souvlaki sticks (wooden skewers) along the folded edge, which will help shape the rolls.
- Roll the Phyllo: Carefully roll the phyllo and nut layer tightly around the skewers to create a tube shape. This rolling technique keeps everything compact and makes it easier to achieve the traditional shape for saragli.

- Create the Crinkle: Gently scrunch the rolled phyllo toward the center of the roll by pushing in from both ends, creating a crinkled look. This adds texture and makes the rolls look beautiful and authentic.
- Remove the Skewers: Slide the souvlaki sticks out from each side carefully to keep the rolled shape intact.
- Arrange in the Baking Dish: Place each rolled phyllo in the buttered baking dish, ensuring the rolls fit snugly side by side. This arrangement helps them bake evenly and hold their shape.
- Repeat: Continue layering, filling, and rolling until you’ve used up all the ingredients and the baking dish is filled with the rolled baklava.
- Cut the Rolls: Using a sharp serrated knife, cut each roll into 3 portions, or to your desired size, to make bite-sized pieces that are easy to serve.
- Brush with Butter: Generously brush the tops of the rolls with the remaining butter to help achieve a golden, crispy finish.
Baking & Finishing Touches

- Bake: Place the baking dish in the preheated oven at a high heat of 200°C. Bake for 20 minutes, allowing the rolls to start turning golden brown.
Then, reduce the temperature to a low heat of 100°C and continue baking for an additional 40 minutes.
NOTE: This slow bake ensures the rolls become crispy and evenly cooked. - Pour Over the Syrup: Remove the rolls from the oven, and while they’re still hot, pour the cooled syrup evenly over the entire dish. Letting cold syrup soak into hot rolls gives them that perfect sticky-sweet texture without making them soggy.
- Let Rest: Allow the rolls to sit for a few hours so they can fully absorb the syrup. This waiting period lets the flavours blend and gives the dessert its signature softness on the inside with a crispy exterior.
Top tips
- Work with Phyllo Carefully: Phyllo dough can dry out quickly once you open the phyllo package. To keep it soft, cover unused sheets of phyllo dough with a damp kitchen towel.
- Avoid Overfilling: Use a thin, even layer of the nut mixture on each phyllo sheet. Too much filling can make rolling difficult and cause uneven baking.
- Roll Tightly: Wrap the phyllo tightly around the souvlaki sticks for the best shape. A snug roll helps create that ideal thickness and easier to crinkle.
- Butter Each Layer: Generously brush each phyllo sheet with melted butter. This adds the delicious, golden crispiness that makes phyllo desserts so good.
- Let the Syrup Absorb: Pour the cooled sweet sugar syrup over the hot rolls and let them sit for a couple of hours. This is the best way to achieve a soft, sticky interior while keeping the exterior crispy.

Serving Suggestions
These Greek baklava cigars are a sweet dessert for any occasion! Here are some of my favourite ways to enjoy and serve them:
- Topped with Fresh Nuts and Honey: Sprinkle fresh walnuts or ground pistachio on top and drizzle with Greek honey *WINK*. This extra touch adds even more flavour and a nice shine.
- With Ice Cream: Add a scoop of vanilla or pistachio ice cream. The creamy ice cream goes so well with the crispy, sweet baklava rolls.
- Greek Coffee: Pair with a cup of Greek coffee. The coffee’s bitterness is the perfect balance to the sweetness. Try serving alongside other classic Greek treats like paximadia or koulourakia for the ultimate kafe. But if you're after a more indulgent dessert biscuit with your coffee, try my chocolate filled melomakarona recipe or these amazing moist orange cupcakes (fluffy portokalopita style).
- For a Full Greek Meal: Want the full Greek spread? Enjoy these baklava rolls after a Greek main dish like pastitsio, moussaka, or stifado. A sweet ending to a traditional meal!

Storage
Baklava rolls can be stored at room temperature for up to 2 days. Keep them in a cool, dry area away from direct sunlight to preserve their crispiness and freshness. Avoid refrigerating if possible, as cold temperatures may cause the phyllo to become soggy.
Keep them covered with plastic wrap or in an airtight container.
Refrigeration
If you need to store the baklava rolls for longer than 2 days, place them in an airtight container and refrigerate.
Freezing
Freezing isn’t ideal, as it can impact the texture of the phyllo. However, if you need to freeze the baklava rolls, store them in an airtight, freezer-safe container.
When ready to enjoy, thaw in the refrigerator overnight, then bring to room temperature or warm briefly in the oven to restore some crispiness.
FAQs
No, feel free to use your personal favourites. Pistachios, walnuts, and almonds give great flavour, but any combination works.
No problem! Just brush with butter and add another sheet on top to patch it. Because we roll them, you can still make it work.
Cover unused sheets with a damp kitchen towel while you work to keep them soft and manageable.
Cut before baking, but feel free to cut again after to ensure each piece is fully separated. This prevents tearing when you pull them out.
Start with a high temperature, then lower it to finish baking evenly. Using just the right amount of butter and pouring cooled syrup over hot baklava gives the perfect crispy phyllo.
📖 Recipe

Baklava Rolls Recipe Easy (Homemade Greek Saragli)
Equipment
- 1 Baking dish 23cm x 30cm Ensure your rolls are snug in your dish
Ingredients
Syrup ingredients
- 420 grams Sugar
- 250 ml Water
- 20 ml Lemon juice
- 1 Cinnamon stick
- 6 Whole cloves
- 1 tablespoon Honey
Baklava Rolls
- 20 sheets Phyllo Pastry (1 packet = approx 400 grams)
- 160 grams Almonds crushed
- 150 grams Pistachios crushed
- 100 grams Walnuts crushed
- 1 tablespoon Ground cinnamon
- 1 teaspoon Ground cloves
- 1 tablespoon Raw sugar
- 300 grams Unsalted butter melted
Instructions
Syrup Instructions
- In a saucepan, combine sugar, water, lemon juice, cinnamon stick, cloves, and honey.
- Place over medium heat, stirring occasionally, and bring the mixture to a boil.
- Boil for 1 minute, then turn off the heat and set aside to cool completely.
Nut Mixture
- Preheat your oven to 200°C (fan-forced).
- Butter the bottom and sides of your baking dish.
- Place one phyllo/ filo sheet on a clean work surface, and brush melted butter over the top.
- Add another sheet on top and brush with more butter.
- Evenly sprinkle a few handfuls of the nut mixture over the sheet.
- Fold the bottom edge up about 5 cm to form a straight edge.
- Place two souvlaki sticks along the fold at the bottom and roll the phyllo tightly around the sticks to create a cigar shape.
- Gently scrunch the rolled phyllo toward the center using your hands, creating a crinkled effect.
- Carefully slide the souvlaki sticks out and place the saragli roll snugly into the baking dish.
- Repeat until all saragli are prepared and lined up in the dish.
- With a sharp serrated knife, cut each roll into 3 portions or your desired size.
- Brush the remaining melted butter generously over the tops.
Baking and Finishing
- Bake in the preheated oven at 200°C for 20 minutes.
- Reduce the temperature to 100°C and bake for an additional 40 minutes, or until golden brown and crispy.
- Remove from the oven and immediately pour the cooled syrup over the hot baklava.
- Let it rest for a few hours to fully absorb the syrup. Serve and enjoy!
Video

Margita Raynor says
Thank you for sharing this recipe
Nikolopaa says
Thanks so much Margita! 😊 Hope you enjoy making (and tasting) the baklava rolls!
Anastasia Asclipenos says
Just made them, thank you so much for the detailed recipe, they turned out great! I've been wanting to try making these for ages, thought it was difficult but once I watched your short video I knew I had to try! 👍
Nikolopaa says
Hey Anastasia! Thanks heaps for giving the recipe a go! Happy to hear they turned out great! 🙏❤️
Michel SAMOILIAN says
Nikolas how long are the 2 chopsticks for souvlaki please?
Nikolopaa says
Hi Michel! They’re about 20cm long 🙂 Hope this help!
DORINA TUDOR says
ThankTHANK YOU for sharing this recipe !!!you for sharing this recipe
Nikolopaa says
Absolutely no problem Dorina! 🙂
Christina Mavrikou says
Grams of ingredients?
Nikolopaa says
Hi Christina! 😊 Yes, I’ve used grams for most of the ingredients. If you’re having trouble finding them, just click on "Jump to Recipe" at the top of the page, or scroll down to the recipe card (just above the comments). Let me know if you need any more help 🙂
JANET REEVES says
I can't wait to try this. Can you use ground cinnamon and cloves or does it work better with the whole pieces? just curious.
Nikolopaa says
Hi Janet! Ground cinnamon and cloves work great for the nut mixture, but whole pieces are best for the syrup to keep it smooth 🙂
JANET REEVES says
I'm Sorry, I forgot to ask the question properly. I was referring
to the syrup when I ask about the spices. thank you !
Janet
Nikolopaa says
No problems Janet! 🙂 I understood what you were asking in the previous question 🙂 Let me know if you have any other questions!
D Nayda says
Thank you for the recipe which I will make just as soon as I convert the measurements into Imperial as having metric and imperial in the same recipe is confusing, with a capital "C".
Rachel says
I never leave reviews, but I felt like I should for this one. I loved this recipe! I have always been intimidated by baklava, but this recipe was easy! The video really helped as well.
Thank you!
Nikolopaa says
Thanks Rachel, really appreciate you leaving a review 🙂 Glad the recipe and video made it easy for you. Yes, these are definitely easier than the traditional version too. Glad you enjoyed!
Maria S. says
Niko! I'm a 61-year-old Greek-Canadian woman and I've never dared to make Baklava until I watched your video! You made it look so easy, and it was. I made it for my book club friends and they loved it, as did my husband and I. I look forward to making more of your recipes. Your videos are fabulous, and the recipe selection is just great. Ευχαριστώ πολύ!
Nikolopaa says
Hey Maria! Love waking up to comments like this 🙂 Happy you gave it a go and it sounds like you absolutely nailed it!
Ευχαριστώ πολύ for the kind words and I look forward to seeing you try more recipes 🙏❤️
Serena Belletti says
How long does this keep or how far ahead can i make this before serving please!
Nikolopaa says
Hi Serena, these baklava rolls will keep for about 2 days at room temperature if you store them somewhere cool and away from sunlight.
Alternatively, you can keep them in an airtight container in the fridge for up to a week. They often taste even better after a day or two as the syrup soaks in 🙂
Cathy says
How long can you keep these for ? Would like to make ahead for Christmas
Thanks so much !!!
Nikolopaa says
Hi Cathy, for best results, I’d recommend making them no more than 2 days ahead. They’ll stay fresh and delicious for your Christmas celebration! That said, these baklava rolls can keep in the fridge for up to a week, so any leftovers will still be great for your guests to take home and enjoy. Hope you have a fantastic Christmas! 😊
Cathy says
Thanks !!! Love your recipes and your videos !!!
Nikolopaa says
Thanks so much Cathy! Appreciate it 🙏
armine says
I have been making baklava for years and made your recipe yesterday. Absolutely fabulous. For my oven, I felt the 200C for 20 minutes was a bit too much, I almost burned it. (hehe) Thank you for your wonderful website.
Nikolopaa says
Thank you so much, Armine! I’m glad you enjoyed the recipe, and it’s amazing to hear from a seasoned baklava maker like yourself 😉 Ovens can definitely vary so good catch adjusting yours 🙂 Thanks for trying my recipe and for your kind words. 🙏
Georgia says
Great recipe and easy! Had to convert ingredients and worked out fine. Love watching you and your content! Thank you! 💗
Nikolopaa says
Thank you so much Georgia! Glad it all worked out 🙂 and appreciate that you enjoy the videos as well haha! Wishing you a great Christmas 🙏
Tamara says
I am making these tomorrow. I was wondering... 100 Celsius is only around 200 Fahrenheit. That seems very low. Is that correct? Thank you
Nikolopaa says
Hey Tamara 🙂 Yes that is correct, 100 degrees Celsius, fan-forced, after the first 20 minutes at 200°C.
Diana Luciani says
Absolutely love your video’s and your receipts are perfect.
Nikolopaa says
Hey Diana 🙂 Thanks so much for your support really appreciate it and glad your enjoying the recipes 🙏
Sofi says
Hi! Which phyllo type do you use, or I guess which number?
Nikolopaa says
Hi Sofi! I’m not sure of the exact number, but I use the Antoniou brand of filo pastry here in Australia. There’s an image of the exact box I use in the blog post under the ingredients section, so feel free to check that out! Alternatively, you can google Antoniou filo pastry to see their site and find something similar near you. Hope that helps!
Sue says
200 degrees convection oven is 390 fareinheit convection ovenWhich seems high is this what you mean. I think I am messing up with the temperature as the rolls seemed somewhat dry. Can you help me clarify? Also did all the butter need to be used up ? Maybe that is why they are a little dry- would love to figure this out as it was a great recipe. Merry Christmas!
Nikolopaa says
Hi Sue! Thank you so much for your kind words and for trying the recipe 🙏 Merry Christmas to you too!
Just to clarify, my oven is fan-forced, so the temperatures in the recipe reflect that. 200°C fan-forced is roughly 390°F in a convection oven, which does sound high, but it’s needed to get that golden, crispy texture during the first 20 minutes. After that, lowering the temperature to 100°C helps bake them through without drying out.
As for the butter, yeah I tend to use all of it, being quite generous between the layers and finishing the rest on top.
I hope this helps, and I’d love to hear how your next batch turns out! 😊