

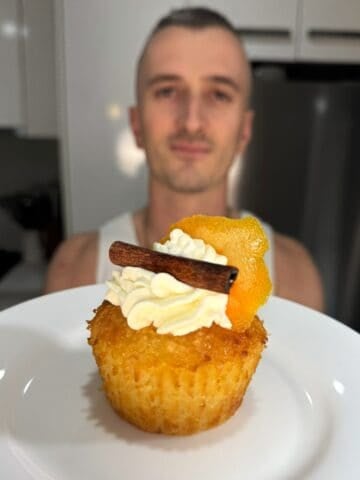
This baklava cheesecake recipe is an absolute showstopping dessert, and a delicious cheesecake take on Greek-style traditional baklava. With crispy, golden phyllo pastry, a nutty base drenched in sweet syrup, and a creamy, tangy cheesecake filling, it’s everything you didn’t know you needed in a dessert!

If you’re a fan of Greek style baklava and love a creamy cheesecake filling, then this is the perfect combination for you. Prefer something more traditional? Try my original baklava, baklava rolls recipe, or galaktoboureko for another Greek classic!
Jump to:
Why You Will Love This Recipe
- The Perfect Combination: This dessert combines crispy, golden phyllo pastry sheets, a nutty base soaked in sweet yet simple syrup, and a creamy filling. This delicious baklava cheesecake recipe is the best of both worlds!
- Nutty Flavours and Warm Spices: Crushed pistachios, almonds, and walnuts, paired with cinnamon and cloves, create a flavour combination that is warm, nutty, and so aromatic.
- Beautiful Layers: From the bottom layer to the top of the cheesecake, each slice shows off the bold baklava layers beautifully. With the cream cheese filling adding the perfect finishing touch.
- A True Showstopper: Whether it’s for a special occasion, holiday season, or a family dinner party, this decadent yet easy dessert recipe will have everyone talking!

Overview Of The Key Steps
Here’s a quick look at how we’ll make this delicious baklava cheesecake and create a dessert that will be truly memorable!
- Make the syrup: Combine sugar, honey, lemon, and spices, then simmer to create a sweet, aromatic syrup.
- Prepare the crust: Layer flaky phyllo pastry sheets with melted butter and bake until perfectly golden.
- Mix the nut filling: Blend pistachios, almonds, walnuts, and warm spices like cinnamon and cloves for a flavour-packed base.
- Make the cheesecake filling: Mix cream cheese, Greek yogurt, and lemon zest for a smooth, creamy filling.
- Assemble and bake: Layer the nuts and cheesecake filling with phyllo, then bake until golden brown.
- Add syrup and chill: Pour the cooled syrup over the cheesecake while it’s still hot, let it soak, and refrigerate before serving.
Watch The Short Video Tutorial
Watch the video below to see how this baklava cheesecake tastes as good as it looks! By following my guidance, you can get the best results even if this is your first time making it.

Don’t forget to like the video, leave a comment, and share it with someone who loves Greek desserts as much as you do!
Ingredients
Let’s take a closer look at what makes this cake so special! As always, check the recipe card below for precise quantities.
Syrup

- Sugar and Honey: The sugar provides the sweetness, while the honey adds a richer, deeper flavour for that classic baklava touch.
- Water: Serves as the base, allowing the sugar and honey to melt together and form a fragrant syrup.
- Lemon Juice: A splash of fresh lemon juice balances the sweetness beautifully, adding a touch of brightness. Don’t forget to save the zest and the other half of the lemon for the cheesecake filling!
- Cinnamon Stick and Cloves: Whole spices infuse the syrup with warm, aromatic flavours, giving it that traditional Greek dessert essence.
Nut Mixture

- Pistachios, Almonds, and Walnuts: This trio of crushed nuts brings a nutty crunch and a rich, earthy flavour to the base.
- Powdered Sugar: Adds a touch of sweetness to enhance the natural nuttiness of the mixture.
- Ground Cinnamon and Cloves: A dash of these spices gives the nut mixture a warm, fragrant depth, making each bite irresistible.
- Melted Unsalted Butter: Helps bind the nuts together and adds richness to the base.
- Syrup: A small amount of the prepared sweet honey syrup ties all the flavours together and keeps the mixture moist.
Cheesecake Batter

- Cream Cheese and Greek Yogurt: The perfect pairing for a smooth, tangy, and creamy filling that balances the sweetness of the syrup and nuts. Unlike other recipes, this one skips heavy cream or sour cream, keeping the filling light yet luxurious.
- All-Purpose Flour: Just a small amount of flour adds structure to the cheesecake, ensuring the filling sets perfectly while remaining creamy.
- Sugar: Sweetens the filling just enough to complement the nutty base and flaky crust.
- Lemon Zest and Juice: Adds a bright, citrusy note to the batter, cutting through the richness of the cream cheese.
- Vanilla Extract: A hint of vanilla brings warmth and rounds out the flavour profile.
- Eggs: Use good-quality, room temperature eggs to bind the filling and create a light, creamy texture when baked.
Phyllo Crust

- Phyllo Dough Sheets: These delicate layers create the light, flaky baklava crust that gives the cheesecake its signature crunch. We do not use puff pastry here. Thin phyllo sheets are essential. As this is a main ingredient, make sure they are good quality, fresh, or fully thawed to ensure they’re easy to handle.
- Melted Unsalted Butter: Generously, brushed between each sheet to ensure they bake into golden, crispy perfection.
- Cloves (for garnish): A simple yet elegant way to provide the finishing touches, making it look just like my classic baklava version.
Preparation
There are a lot of steps in this recipe, and like always, I do my best to help get you set up and prepared for success. Here’s what you need to do so you can create this effortlessly:

- Crush Your Nuts: Have your nuts already crushed and ready to go. I recommend using a food processor to grind them down to a small yet crunchy consistency.
- Zest your lemon: Finely grate the lemon peel into a small bowl/ plate and set it aside for the cheesecake batter later. Remember, you’ll use half of the juice for the syrup and the other half for the batter.
- Prepare Your Work Area: Set up a clean work surface to keep everything laid out nicely, which is especially important when working with sheets of phyllo dough.
- Small Pots for Butter and Syrup: Melt the butter in a small pot and set aside the portion needed for the nut mixture. Do the same for the syrup, ensuring you remove the portion required for the nut mixture.
Gather your tools

- Damp Kitchen Towel: Use a clean, damp kitchen towel to cover the phyllo sheets while you work. This prevents them from drying out.
- Pastry Brush: I prefer working with a plastic brush to avoid strands coming off while brushing.
- Large Mixing Bowls: One large bowl for the nut mixture and another large mixing bowl for the cheesecake batter.
- Electric Hand Mixer or Stand Mixer: For easily mixing the cheesecake batter to perfection.
- Springform Tin: Use a 26 cm cake pan with a removable base to easily take the cheesecake out once it’s set.
- Sharp Knife: Use a serrated knife with small teeth for easily scoring the cake before baking.
Step-by-step Instructions
Follow these steps to create your showstopping baklava cheesecake. Make sure to use the images to guide you along the way, and don’t forget to check out my step-by-step video for extra guidance!
Syrup Preparation

- Combine Ingredients: In a small saucepan, add the water, sugar, half the lemon juice, cinnamon stick, cloves, and honey. This creates the flavours for the classic sugar syrup we all enjoy with Greek baklava!
- Bring to a Boil: Place the saucepan over medium heat and stir occasionally with a wooden spoon. Allow it to come to a boil for around 1 minute to ensure everything dissolves, and the spices infuse perfectly.
- Remove Spices: Use a fork or small sieve to remove the cinnamon stick and cloves from the syrup.
- Portion for Nut Mixture: Pour a portion of the syrup into a small bowl, as required for the nut mixture, and set it aside.
Note
- We prepare this as the first thing to give it time to cool down before it’s poured over the hot cake. If you enjoy the flavour of rose water, you can add a splash to your syrup for an extra floral touch.
Prepare the Phyllo Crust

- Preheat and Brush the Pan: Start by preheating your oven to 180°C (fan-forced). Next, generously brush the bottom of the pan and then the sides of the pan with melted butter. The springform I use is 26cm in diameter.
- Layer the Phyllo Sheets: Lay the first phyllo sheet into the pan, gently pressing it into the sides and base. Brush the sheet with melted butter, ensuring it’s evenly coated. Repeat with just under half of the phyllo sheets, brushing each layer generously with butter as you go.
- Trim the Edges: Once all the sheets are layered, trim the overhanging phyllo edges. Keep the off-cuts covered with the rest of your sheets under the damp towel, as they’ll be used later.
- Bake the Crust: Before placing the tin in the preheated oven, set the springform tin on a tray to catch any dripping butter during baking. Bake for 12–15 minutes, or until the phyllo is golden and crisp. If the phyllo puffs while baking, you can press it down gently mid-bake or after it’s done. A few cracks are fine and won’t affect the result.
Nut Mixture

- Combine the nuts: In a large mixing bowl, add the crushed pistachios, almonds, and walnuts. These create the nutty, flavour-packed base for your baklava cheesecake.
- Add the Flavours: Add in the powdered sugar, ground cinnamon, and cloves. These warm spices bring the classic Greek baklava flavour to life.
- Incorporate the Syrup and Butter: Pour in the melted butter and the syrup which was set aside previously.
- Mix and Set Aside: Mix everything together well until evenly coated, then set aside for assembly later.
Cheesecake Batter

- Cream the Base: In a large mixing bowl, beat the cream cheese and sugar with an electric hand mixer or stand mixer until smooth and creamy.
- Add the Remaining Ingredients: Add the Greek yogurt, flour, lemon zest, lemon juice, vanilla extract, and eggs to the bowl. Mix everything together until fully combined, being careful not to overmix to keep the batter light and airy.
- Set Aside: Once mixed, set the batter aside while you prepare for the assembly.
Assemble and Bake

- Layer the Nut Mixture: Spread the prepared nut mixture evenly over the baked phyllo crust, pressing it down firmly with a spatula or the back of a spoon to compact it.
- Add the Off-Cuts: Place the reserved phyllo off-cuts over the nuts and brush them generously with melted butter.
- Add a Full Phyllo Sheet: Place one full phyllo sheet on top of the buttered off-cuts and brush it generously with butter.
- Pour the Cheesecake Batter: Gently pour the cheesecake batter over the phyllo, spreading it evenly with a spatula to create a smooth layer.

- Layer the Remaining Phyllo Sheets: Add the remaining phyllo sheets on top, brushing each one generously with melted butter as you layer.
- Score and Garnish: Using a sharp knife, carefully score the top phyllo layer into triangles, ensuring not to cut all the way through to the filling. Keep the score lines from crossing or touching.
- Roll the Edges: Roll the overhanging phyllo edges of the cheesecake inward to create a neat border. Ensure the rolled edges tuck inside the sides of the springform pan to make it easy to remove after baking. Brush the border with melted butter to give it a golden finish.
- Garnish: Place a whole clove in the centre of each scored slice for garnish, making it look just like the classic baklava version!
- Bake: Reduce the oven temperature to 160°C (fan-forced). Place the springform tin (with the tray underneath) in the oven and bake for 60–70 minutes, or until the phyllo is golden brown and the cheesecake is set.
Notes
- Trim Before Baking (Optional): Before baking, you can trim the crusty phyllo edges that overhang the springform pan to make removing the cake easier after it’s baked. Alternatively, you can choose to do this later once it has cooled.
- Temperature Check: Use a thermometer to check that the centre of the cheesecake reaches between 65°C to 70°C. This ensures it’s perfectly baked, set, and creamy.
Add Syrup and Serve

- Pour the Syrup: Once the cheesecake is baked and still hot, immediately pour the cooled syrup over it. Focus on the edges first, ensuring the phyllo and nut layer (by going down the sides) absorb most of the syrup, then drizzle some over the centre for balance.
- Cool and Chill: Allow the syrup to soak in at room temperature for a few hours to ensure the layers are fully infused. Then transfer the cheesecake to the fridge to chill for at least 4 hours or overnight for the best results.
- Remove and Plate: Carefully remove the springform pan, ensuring the crust and edges remain intact. Place the cheesecake on a serving dish or cake stand for the perfect presentation.
- Serve: Slice along the pre-scored triangles and enjoy your beautifully layered baklava cheesecake!
Top Tips
- Keep Phyllo Fresh: Always cover your phyllo sheets with a damp kitchen towel while working. This prevents them from drying out and cracking, ensuring easier handling and always a perfectly even layer.
- Generously Butter: Don’t skimp on the melted butter! Brushing each layer thoroughly ensures golden, flaky layers of phyllo pastry and that signature baklava crunch.
- Score the Top Carefully: When scoring the top phyllo layer into triangles, avoid cutting through to the filling. Keep the lines clean and separate to make serving easier and the presentation stunning.
- Roll Past the Edges: Ensure you roll the overhanging phyllo past the edge of the cake tin, otherwise, you’ll have trouble removing it later.
- Use a Thermometer: For the best results, check that the centre of the cheesecake reaches between 65°C to 70°C. This ensures the cheesecake is perfectly baked without overcooking.
- Pour Syrup While Hot: Always pour the cooled syrup over the cheesecake while it’s still hot from the oven. This allows the syrup to soak into the layers, creating the perfect texture.
- Don’t Skip the Resting: Let the cheesecake come to room temperature, then place it into the fridge for at least 4 hours, but preferably overnight. This helps the bake cheesecake set firmly and hold its shape when cut.

Serving suggestions
- Extra Nuts and Honey: Just like with my other baklava recipes, you can make this dessert pop by sprinkling it with more fresh nuts and a drizzle of Greek honey, wink! While some people like to add maple syrup, honey keeps it traditional.
- Coffee Pairing: Enjoy a slice alongside a cup of strong Greek coffee or espresso for the ultimate dessert experience.
- For a Full Greek Meal: If you want to turn heads all night, not just with dessert, serve this after a beloved Greek main dish like moussaka, pastitsio, or gemista! Wow your guests with a hearty, flavour-packed meal, then finish it off with this crazy-good baklava cheesecake.

Storage
Refrigerate
- Store your baklava cheesecake in an airtight container in the refrigerator for up to 5 days.
Make ahead
- This dessert is ideal for making a day ahead. The flavours develop beautifully, and the layers set perfectly, ensuring clean slices and an impressive presentation.
Freezing
- While freezing isn’t ideal due to the delicate phyllo crust, and it will lose its crispiness, you can freeze individual slices if necessary.
- Wrap each slice tightly in plastic wrap, then place them in an airtight container or cover with a layer of aluminium foil.
- Frozen slices can be kept for 2-3 months, simply thaw overnight in the fridge before serving.
📖 Recipe

Baklava Cheesecake Recipe (Greek Style)
Equipment
- 1 Springform Cake Tin (26cm diameter)
Ingredients
Syrup
- 200 grams Sugar
- 120 grams Water
- ½ Lemon juiced zest and other half reserved for cheesecake filling
- 1 Cinnamon Stick
- 4 Whole cloves
- ½ tablespoon Honey
Nut Mixture
- 160 grams Almonds crushed
- 150 grams Pistachios crushed
- 100 grams Walnuts crushed
- 50 grams Powdered sugar icing sugar
- 1 tablespoon Ground cinnamon
- 1 teaspoon Ground cloves
- 50 grams Unsalted butter melted
- 50 grams Syrup from syrup above
Cheesecake Batter/ Filling
- 500 grams Cream cheese softened
- 250 grams Greek yoghurt strained
- 200 grams Sugar
- 1 tablespoon All-Purpose Flour
- 1 Lemon zest
- ½ Lemon juiced
- 2 teaspoon Vanilla extract
- 3 Eggs
Phyllo Crust
- 20 sheets Phyllo pastry (1 packet = approx 400 grams) 15 sheets will be fine & count sheets before starting as they vary
- 250 grams Unsalted butter melted
- 10 Whole cloves optional for garnish
Instructions
Syrup Instructions
- Combine the sugar, water, lemon juice, cinnamon stick, cloves, and honey in a saucepan.
- Place over medium heat and stir occasionally until it comes to a boil.
- Boil for 1 minute, then turn off the heat.
- Zest the lemon before juicing it, and set the zest aside for the cheesecake filling. Let the syrup cool completely.
Prepare the Phyllo Crust
- Preheat the oven to 180°C (fan-forced).
- Brush a 26 cm springform pan with melted butter. Keep a tray under the pan for the entire process, especially during baking, to catch any dripping butter.
- Lay a sheet of phyllo pastry in the pan and brush with melted butter. Repeat with just under half of the sheets, brushing each layer generously. Do your best to avoid tearing the sheets and press them neatly into the sides of the pan.
- Trim any overhanging phyllo and keep the off-cuts aside under a damp kitchen towel for later use.
- Bake for 12–15 minutes or until the phyllo is golden and crisp. If the phyllo puffs while baking, you can press it down gently mid-bake or after it's done. A few cracks are fine and won’t affect the result.
Nut Mixture
- In a large bowl, combine the almonds, pistachios, and walnuts.
- Add powdered sugar, ground cinnamon, ground cloves, melted butter, and 50 grams from the syrup previously prepared. Mix well until evenly coated.
- Set aside for assembly.
Cheesecake Batter/ Filling
- In a large bowl, beat the cream cheese and sugar until smooth and creamy.
- Add the Greek yogurt, flour, lemon zest, lemon juice, vanilla extract, and eggs. Mix everything together until fully combined. Be gentle to avoid overmixing, which helps keep the filling light.
- Set aside for assembly.
Assemble and Bake
- Spread the entire nut mixture evenly over the baked phyllo base and press it down firmly to compact.
- Place the reserved phyllo off-cuts over the nuts, brushing with melted butter. Add one more layer of phyllo pastry on top and brush with melted butter.
- Pour the cheesecake filling over the phyllo and spread evenly with a spatula.
- Layer the remaining phyllo sheets on top, brushing each with melted butter.
- Using a sharp knife, score the top phyllo layer into triangles, ensuring not to cut through to the filling. Keep the score lines from crossing or touching. Place a whole clove in the centre of each triangle for garnish.
- Roll the overhanging phyllo inward to form a neat border around the edge. Brush the border with melted butter and ensure it stays inside the pan for easy removal after baking.
- Before baking, you can trim the crusty phyllo edges that overhang the springform pan to make removing the cake easier after it’s baked. Alternatively, you can choose to do this later once it has cooled.
- Reduce the oven temperature to 160°C (fan-forced) and bake for 60–70 minutes, or until the phyllo is golden and the cheesecake is set. Use a thermometer to check the filling (65–70°C in the centre internally).
Add Syrup and Serve
- Once baked, immediately pour most of the cooled syrup around the edges of the cheesecake, ensuring some reaches the middle.
- Allow the syrup to soak in at room temperature for a few hours.
- Chill the cheesecake in the fridge for at least 4 hours or overnight.
- Remove the springform pan and transfer the cheesecake to a serving dish or cake stand.
- To serve, cut along the pre-scored triangles and enjoy your beautifully layered baklava cheesecake!
Video
Notes
- Portions: This recipe makes 8 large pieces, but you can cut them smaller to make 10 pieces if desired.
- Phyllo Pastry Tip: Always keep your phyllo pastry covered with a damp kitchen towel while working to prevent it from drying out and cracking.
- Make Ahead: This cake is best prepared a day in advance. Allowing it to fully set in the fridge ensures it hardens enough to hold its shape when sliced.
- Storage: Store any leftovers in an airtight container in the refrigerator for up to 5 days.

Maria Kouzinoglou says
Ευχαριστούμε Νικολό για τα όμορφα που μας δείχνεις. Thank you for the beautiful recipes
Nikolopaa says
Ευχαριστώ πολύ Μαρία! Χαίρομαι που σου αρέσουν οι συνταγές μου. Καλή χρονιά να έχεις! 😊
Michael Zannetides says
Thank you for sharing this recipe
Nikolopaa says
No worries Michael! Happy to be able to share 🙏
Yana Navarre says
Absolutly gorgeous Niko !! I love seeing your creations. This baklava cheesecake will definitely be served at one of my get togethers.
Nikolopaa says
Thank you so much Yana! I’m glad you love them 🙂 I hope it’s a big hit at your next get together!
Stasi says
Ρε φίλε, τα πεθερικά μου έχουν γίνει θαυμαστές μου με τις συνταγές σου! Bonza mate! Ευχαριστώ!
Nikolopaa says
Blooody beautiful mate 😉 Πες τους ένα μεγάλο ευχαριστώ από μένα!
Poly says
Made this for Easter dinner and everyone loved it! Thank you for this amazing recipe!
Nikolopaa says
Hey Poly 🙂 Amazing! That’s what I love to hear ❤️ Great dessert to finish off Easter dinner! Appreciate you making my recipe 🙏