

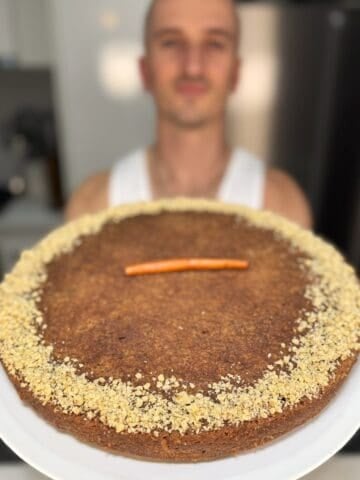
This Greek Ekmek Kataifi recipe has all the elements of a good food story. A crunchy, nutty, syrup-soaked kataifi pastry base, a thick, creamy vanilla custard in the middle, and a fluffy whipped cream topping with chopped nuts and a sprinkle of cinnamon. Trust me, it’s out of this world delicious, and you’ve got to try it!

If you’re a fan of baklava, you’re going to love this dessert. It has the same nutty, syrup-soaked goodness but with creamy custard and whipped cream.
You might also enjoy my galaktoboureko, a traditional Greek dessert made with layers of custard and pastry. For something quick and easy, check out my galatopita recipe, a beautiful milk pie that is perfect for any occasion.
Jump to:
What is Ekmek Kataifi
Ekmek kataifi is a delicious dessert with multiple layers, each adding its own unique flavour and texture to create a truly unforgettable treat.
Although this dessert has Turkish origins (in Turkey, "ekmek" means bread and often refers to a sweet dessert bread), the Greek version has evolved into something entirely different and is now a cherished part of Greek culture.
You know I love a layered, syrupy dessert, and this one is no exception. Let’s break down the layers in this classic Greek dessert.
- Base layer (Kataifi pastry): The bottom layer is made with kataifi pastry, a shredded or finely chopped phyllo dough. Crushed nuts are added to the pastry, giving it a nutty flavour and delightful crunch. Once drizzled with syrup, the base becomes sweet, textured, and absolutely amazing.
- Custard layer: On top of the pastry base sits a thick, creamy custard made with milk, sugar, eggs, flour and cornstarch. This smooth layer brings a luscious richness that balances perfectly with the crunch below.
- Whipped cream topping: The final touch is a layer of fluffy whipped cream. Light and airy, it contrasts beautifully with the creamy custard and crunchy pastry. Garnished with crushed pistachios and a sprinkle of cinnamon, it’s the ultimate finishing touch.

Why This Recipe Works
Making ekmek kataifi is a big process, yet it’s easier than it seems when you follow my guides. I’ve broken it into clear sections for each layer, and you can choose how to follow along:
- Step-by-step instructions with images.
- Short-form video for quick guidance and a laugh.
- Long-form YouTube video for an in-depth walkthrough.
I’ve crafted the ultimate guide to help you master this dessert with confidence and ease, so you can feel comfortable making it for special occasions.
Watch The Video Tutorials
Master this recipe the first time with my two easy-to-follow video guides! Whether you’re short on time or want every detail, I’ve got you covered.
Short Video
Need a quick overview? Then check out my short, step-by-step tutorial for a fast rundown of this delicious Greek ekmek kataifi recipe. Plus, it's perfect for getting the gist of the process in minutes!

In-Depth Video
Want more details? If so, dive into my in-depth YouTube video, where I guide you through every step of the recipe with extra tips and insights to ensure you create the perfect dessert.

If you think this is one of the best Greek ekmek kataifi recipes, don’t forget to like the video, leave a comment, and share it with a friend who would love it!
Ingredients
Let’s take a closer look at what makes this traditional dessert so special! As always, check the recipe card below for exact quantities.
Syrup

- Sugar: Regular granulated sugar is the heart of this syrup’s sweetness. Feel free to adjust the amount slightly to suit your taste.
- Lemon juice: Freshly squeezed lemon juice adds a zesty citrus kick, perfectly balancing the syrup’s sweetness.
- Cinnamon stick: A single stick of cinnamon infuses the syrup with its warm and aromatic essence.
- Honey: For that final touch, good quality honey enhances the flavour with its natural sweetness.
Kataifi Base

- Kataifi pastry: This shredded phyllo dough gives the dessert its signature texture. I buy a chilled version from the fridge section at my local grocery stores. If you’re struggling to find it, try a Greek or Middle Eastern super market.
- Unsalted butter (melted): The key to achieving a perfectly crispy and golden pastry. The melted butter evenly coats the kataifi strands, ensuring they bake to perfection.
- Crushed walnuts: Add a rich, earthy flavour and a satisfying crunch. Feel free to adjust the amount to suit your taste.
- Crushed pistachios: Slightly sweet and nutty, pistachios add vibrant colour and pair beautifully with the walnuts.
Custard

- Whole eggs: Both the egg yolks and the egg white contribute to the custard’s structure and flavour. Using room-temperature eggs ensures smoother mixing and a silky finish.
- Caster sugar: This fine sugar dissolves quickly, creating a perfectly sweet custard. Feel free to adjust the sweetness to your preference.
- Cornflour (AUS)/ corn starch (USA) and plain flour: This duo works together to thicken the custard to a smooth, creamy consistency.
- Milk: The base of any great custard, milk brings everything together for a rich, luscious texture.
- Vanilla extract: A touch of vanilla adds warmth and sweetness to the custard. Use a high-quality essence for the best flavour, or vanilla powder if that’s what you have on hand.
Whipped Cream

- Thickened cream/ heavy cream: This is the base of the whipped cream, giving it a rich and velvety texture. Make sure it’s well chilled before whipping for the best results.
- Vanilla bean paste: Adds an intense vanilla flavour with those beautiful specks that elevate both taste and presentation.
- Icing sugar: Sweetens the cream and helps maintain a smooth, fluffy consistency. Adjust the sweetness to your liking for the perfect balance.
Garnish

- Ground cinnamon: Not only does it add a warm, aromatic flavour, but it also looks fantastic sprinkled over the whipped cream.
- Crushed pistachios (or a mix with walnuts): These add a nutty crunch and vibrant colour, providing that final touch to make this dessert a true crowd pleaser.
Preparation
Before you begin, here's a few things to make sure you have ready:

- Thaw the kataifi pastry: If using frozen pastry, thaw it in the fridge overnight. If it's fresh, you're ready to go!
- Crush your nuts: Use a blender or a pestle and mortar to chop your nuts into smaller pieces while keeping a good texture for that satisfying crunch.
- Prepare your baking dish: I like to use a glass dish because it shows off the beautiful layers. The size I use is 31 x 23 cm (12 x 9 inches).
- Melt your butter: Have your butter melted and ready to drizzle for easy assembly.
How to Make
Follow these steps along with the images as guidance, and remember, if you need any extra help, I’ve got 2 videos ready to guide you every step of the way!
Syrup

- In a small saucepan, combine the water, sugar, lemon juice, cinnamon stick, and honey. Stir everything together to blend the flavours.
- Bring the mixture to a boil over medium heat, then reduce to a simmer. Let it cook for 2 minutes to slightly thicken.
- Remove the saucepan from the heat. Discard the cinnamon stick, and set the syrup aside to cool completely. It doesn’t need to be cold syrup, but ensuring it’s a cool syrup is essential. Pouring hot syrup over the pastry can make it soggy, so don’t skip this step!
Kataifi Base

- Preheat your oven to 175°C (347°F) to ensure even baking.
- Place the kataifi pastry into a deep baking dish. Using your hands, gently separate and fluff the strands to remove any clumps.
- Evenly sprinkle the crushed walnuts and pistachios over the fluffed pastry. These add a nutty crunch that elevates every bite.
- Drizzle the melted butter generously over the pastry, ensuring all strands are coated as best as possible. This step is crucial for achieving a crisp and golden brown finish.
- Place the dish in the preheated oven and bake for about 20 minutes, or until the pastry turns golden brown and crisp. Keep an eye on it to avoid over-browning.
- Once baked, remove the hot kataifi base from the oven. Immediately pour the room temperature syrup evenly over the phyllo pastry. You’ll hear a satisfying sizzle, this means the syrup is being absorbed properly. Allow the pastry to soak for 10 minutes, ensuring every layer is infused with the sweet syrup. While it soaks, you can move on to preparing the custard.
Custard

- In a large mixing bowl, beat the eggs with half the sugar until the mixture becomes a little creamy. Set it aside while you prepare the milk mixture.
- In a medium saucepan, combine the milk, cornflour, plain flour, the remaining sugar, and vanilla essence. Whisk everything together over medium heat, ensuring no lumps form. Heat the mixture gently, stirring continuously.
- To temper the eggs, ladle a small amount of the warm/ hot milk mixture into the beaten eggs while whisking constantly. This step prevents the eggs from scrambling.
- Gradually pour the tempered egg mixture back into the saucepan with the remaining milk mixture. Continue whisking constantly to combine.
- Cook the custard over medium heat for about 5 minutes, or until it thickens into a smooth, glossy consistency. Remove it from the heat once it reaches the desired thickness.
- Pour the custard evenly over the crispy kataifi base. Use a spatula to smooth the surface for an even layer. Cover the custard with cling film/ plastic wrap, pressing it directly onto the surface to prevent a skin from forming. Refrigerate the dish for at least 2 hours to allow the custard to set.
Whipped Cream

- In a chilled clean bowl, combine the thickened cream, vanilla bean paste, and icing sugar. Using a hand or stand mixer, beat the mixture on medium speed until soft peaks form.
- Once the custard has set, spread the whipped cream evenly over the top, creating a smooth, fluffy layer.
Garnish and Serve

- Generously sprinkle ground cinnamon and crushed pistachios (or a mix of walnuts and pistachios) over the top of the whipped cream. This adds both flavour and a pop of vibrant colour.
- Carefully slice the kataifi into neat square pieces, ensuring the beautiful layers are on full display. Serve immediately and enjoy every delightful bite!
Top Tips For Making My Greek Ekmek Recipe
- Preparation is key: Before you start, have all your ingredients measured and ready. Thaw the kataifi pastry if frozen, and finely crush the nuts for a smoother process.
- Even butter distribution: Drizzle melted butter evenly over the kataifi pastry. Feel free to massage it in with your fingers if you feel it needs better coverage, this step ensures a perfectly golden and crispy base.
- Syrup saturation: When pouring the syrup over the hot pastry, make sure every part is soaked well. Allow time for the syrup to absorb fully, ensuring a moist and flavorful dessert.
- Custard cooking tip: When cooking the custard, it’s crucial to whisk custard continuously, especially near the bottom of the pan. If you don’t keep it moving, the custard can stick and burn, resulting in little dark specs that will affect the texture and flavour a little.
- Don’t skip the chilling: So you achieve the best results, refrigerate your ekmek kataifi for several hours. This then makes sure the custard is properly chilled is crucial for achieving a firm, set dessert and clean, neat slices.
- Whipping cream tips: Use well-chilled cream, a cold bowl, and clean beaters. Whip the cream just until soft peaks form—overwhipping can lead to a grainy texture.
- Garnish for presentation: Don’t skip the finishing touches! A sprinkle of crushed pistachios and a dusting of ground cinnamon elevates both the look and flavour of your dessert.

Tips For Working With Kataifi Pastry
- Use fresh pastry if possible: Fresh kataifi pastry yields the best results and is ready to work with straight away.
- Thaw properly: If using frozen pastry, thaw it in the fridge overnight. Avoid quick-thaw methods like microwaving, as this can make the pastry soggy and harder to handle.
- Handle with care, but don’t stress: While kataifi pastry is delicate, it can handle a bit of roughness. Just make sure there are no clumps—take your time and stretch it out in portions, ensuring it’s opened up nicely and evenly spread. This will create a light, flaky base with perfect texture.
By following these steps, your ekmek kataifi will come together beautifully and delight everyone with its stunning layers and delicious flavours.
Storing
- Refrigeration: So you can keep your dessert fresh, tightly cover your dish with cling wrap and store it in the refrigerator for up to 5 days. This then ensures the layers stay intact and flavours remain vibrant.
- Avoid freezing: While refrigeration works perfectly, freezing is not ideal. It can ruin the delicate texture of the pastry, custard, and cream, leaving the dessert less enjoyable.
Variations
- Swap the Nuts: Feel free to use your favourite nuts! Almonds are a fantastic alternative, or mix them with chopped pistachios for an extra layer of flavour. If you’re not a fan of nuts, you can skip them altogether!
- Syrup Enhancements: Add a splash of rose water or orange blossom water to the syrup for a fragrant twist to the sweet base. While I prefer to keep it simple, many people love this addition for its aromatic flair.
- Mastiha (Mastic Gum): For a unique flavor, try adding a small pinch of mastiha to the custard. Less than ¼ teaspoon is all you need for a subtle touch that complements the dessert beautifully.
- Pair with Vanilla Ice Cream: Take it up a notch by serving slices of ekmek kataifi with a scoop of vanilla or pistachio ice cream. The combination of warm spices and creamy ice cream is absolutely wild!
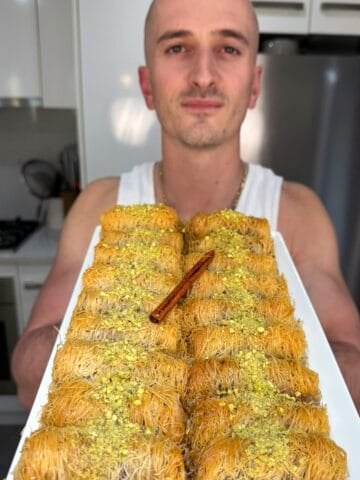
- Try Other Kataifi Recipes: Want to explore more? My Greek kataifi rolls recipe is a must-try. It's made with the same shredded filo pastry we use here, filled with crushed nuts and soaked in warm spiced syrup. If you're after something a little different but still rich and indulgent, you'll love it.
FAQs
The Turkish words "Ekmek Kataifi" translate to "bread kataifi." In Turkey, it often refers to a bread pudding, soaked in syrup and finished with clotted cream. While equally beautiful, the Greek version is distinctly different, featuring a crisp shredded dough base layered with custard and whipped cream.
Kataifi pastry is a unique type of shredded phyllo dough that resembles fine, delicate strands. Also known as kataifi dough, it is a staple in many desserts across the Mediterranean and Middle Eastern regions, including Greece.
📖 Recipe

Greek Ekmek Kataifi Recipe (Whipped Cream Custard Dessert)
Equipment
- 1 Baking Dish 31 cm x 23 cm
Ingredients
For the Syrup
- 2 cup water
- 2 cup sugar
- ½ lemon (juiced)
- 1 cinnamon stick
- 1 tablespoon honey
For the Kataifi Base
- 350 grams kataifi pastry
- 250 grams melted butter (unsalted)
- 50 grams walnuts (crushed)
- 50 grams pistachios (crushed)
For the Custard
- 4 eggs
- 100 grams sugar mix with eggs
- 100 grams sugar mix with milk
- 100 grams cornflour (Australia) cornstarch (USA)
- 100 grams plain flour
- 1.5 liters milk
- 1 teaspoon vanilla essence
For the Whipped Cream
- 600 ml thickened cream heavy cream
- 1 teaspoon vanilla bean paste
- 20 grams icing sugar
For the Garnish
- 1 teaspoon ground cinnamon
- 50 grams pistachios (crushed) or a mix of pistachios and walnuts
Instructions
Prepare the Syrup
- Combine water, sugar, lemon juice, cinnamon stick, and honey in a saucepan. Mix well and bring to a boil. Simmer for 2 minutes.
- Remove from heat, discard the cinnamon stick, and allow the syrup to cool.
Prepare the Kataifi Base
- Preheat your oven to 175°C (347°F).
- Place the kataifi pastry in a deep baking dish and gently separate and fluff the strands with your hands, ensuring no clumps remain. Work quickly to prevent the dough from drying out.
- Sprinkle the crushed walnuts and pistachios evenly over the pastry.
- Drizzle the melted butter evenly over the pastry, ensuring all the strands are coated as best as possible.
- Bake for 20 minutes or until golden brown and crisp. Remove from the oven.
- Immediately pour the cooled syrup evenly over the hot kataifi base. It will sizzle, which is normal. It needs 10 minutes to fully absorb, but you can start working on the custard now.
Make the Custard
- In a mixing bowl, beat the eggs with half the sugar until creamy, then set aside.
- In a saucepan, whisk the milk, cornflour, plain flour, the remaining sugar, and vanilla essence over medium heat. Warm gently, whisking constantly to avoid lumps.
- Temper the eggs by adding a ladle of the warm milk mixture to the beaten eggs while whisking continuously.
- Gradually pour the tempered egg mixture back into the saucepan, whisking constantly. Cook for around 5 minutes, until the custard thickens to a smooth, glossy consistency.
- Remove from heat and pour the custard evenly over the kataifi base. Cover the surface with cling wrap, pressing it directly onto the custard to prevent a skin from forming. Refrigerate for at least 2 hours to set.
Prepare the Whipped Cream
- In a mixing bowl, beat thickened cream, vanilla bean paste, and icing sugar until soft peaks form.
- Spread the whipped cream evenly over the set custard layer.
Garnish and Serve
- Sprinkle ground cinnamon and crushed pistachios over the whipped cream.
- Slice into portions and serve chilled.
Video
Notes
- Extra Help Available: In my blog post above, I’ve included detailed step-by-step images, a short-form video, and a long-form video to guide you through every step of the recipe. Be sure to check them out for extra help!
- Make-Ahead Tip for Syrup: The syrup can be prepared a day ahead and stored in the fridge to save time on the day of assembly.
- Custard Tip: Temper the eggs slowly by adding the warm milk mixture a little at a time while whisking. This prevents curdling and ensures a smooth custard.
- Storage: Cover leftovers tightly with cling wrap and store in the refrigerator for up to 5 days.


Peter says
Yes please! Making the wife make this for the next event
Georgia says
Hands down the best cream kataifi recipe on the internet
Nikolopaa says
Thanks Georgia!!
Klaus says
Outstanding Niko!
5 Star for the delicous Ekmek Kataifi dessert and the really great explanation, very detailled and well structured!
Excellent!
Nikolopaa says
Hi Klaus! Thank you so much for your kind words and the 5-star review! I’m happy you enjoyed the creamy kataifi and found the explanation helpful. Happy cooking, and I hope you make it again soon!
Sue says
If you cannot get kataifi can you shred phyllo??
Nikolopaa says
Hey Sue 🙂 It's completely different and would give a completely different texture I'd say. Kataifi is much finer and crisps up differently, whereas shredded phyllo would be denser and not as light and airy. Is there any Mediterranean or even Middle Eastern supermarkets nearby? They usually stock kataifi
Kristina says
I've made this for the fam a few times now. Always a huge hit and love watching the reactions of that 1st mouthful. Been told it's the best dessert they've ever had 😀 and we've had some crackers!
Nikolopaa says
Love hearing this, Kristina! So glad it’s a hit with the family, that’s the best! Haha killa, that’s a good compliment 🙂
Emily says
So excited to make this! Can I prep day before event and leave it in the fridge overnight?
Nikolopaa says
Hey Mily, yes absolutely! I actually recommend making it a day ahead because it has so many layers and everything needs to cool down before starting the next parts. Enjoy 🙂
Darlene Hadden says
My son and wife went to Greece and raved about Ekmek so I found your YouTube video and tried the recipe. They were both impressed and said it was just as good as the one they had in Greece. Thanks for sharing!
Nikolopaa says
Love hearing that Darlene 🙏 Big compliment when it matches up with what they had in Greece thanks for giving it a go!
Bea says
I absolutely love this dessert! Anything with Kataifi & I'm addicted to it. I make the rolls during the holidays & mail them all over the United States to family. They love those every year for Christmas. Your videos are amazing. I make everything you do! Thank you so much for sharing your recipes with me!!
Nikolopaa says
Love that you post kataifi rolls to your family, that's love right there! Bea you’re a legend! I’m honoured you make so many of my recipes 🙏