
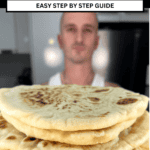
Are you ready to create the softest, fluffiest pita bread at home? Once you try this easy homemade Greek pita bread recipe, you'll never return to store-bought!
It's delicious and rewarding, and the freshness makes all the difference.

This easy recipe is simple to follow, and you’ll get beautiful, golden brown pitas that are perfect for gyros, dipping in your favourite tzatziki sauce paired with chicken souvlaki and lamb and pork souvlaki. If you’re looking for a similar recipe with a different twist, try my Cypriot pita bread recipe for a pocket-style pita that’s ideal for stuffing!"
Jump to:
Why You Will Love This Recipe
- Super Soft and Fluffy: Trust me, this pita bread is so light and airy that you won’t believe how soft it feels! The texture is pillowy, making each bite melt in your mouth.
- Versatile and Delicious: It pairs perfectly with a variety of dishes, making it great for dipping in sauces like this tirokafteri recipe, skordalia, my melitzanosalata recipe, or serving alongside salads.
- Quick and Simple: With just a few basic ingredients, you’ll have homemade pita bread on the table in no time. Plus, it’s way better than store-bought pita!
- Elevates Your Gyros Game: If you’re a fan of gyros, this homemade fluffy Greek bread will take them to the next level, adding an unmatched softness and warmth.
How to Make These Pites - Short video
Want to see how it’s done? Watch my step-by-step tutorial on making this fluffy pita bread, and you’ll see just how simple it is to master!

Remember to click the like button, comment, and share the video with your friends!
Ingredients
Let’s take a closer look at what makes this recipe so special! As always, see the recipe card below for precise quantities.

- Bread Flour: This is your secret to getting that perfect chew and structure in your pita bread!
- Greek Yoghurt: Adds softness and a slight tang, making your pitas extra fluffy and flavourful.
- Olive Oil: Keeps the dough nice and moist while adding a rich, subtle flavour.
- Yeast: This recipe calls for active dry yeast, which helps your dough rise perfectly.
- Warm Water: Helps activate the yeast, ensuring your dough is light and airy.
- Sugar: Feeds the yeast, helping it activate better.
- Salt: Use good quality sea salt or kosher salt to bring out the best taste.
Preparation
Before you start, ensure you have all your ingredients measured out—it’ll make the whole process smoother!
Have a clean work surface ready for kneading and shaping your dough. Also, ensure your Greek yoghurt is at room temperature so it mixes smoothly into the dough and helps with the final texture.
Have some plastic wrap handy for covering during the dough rise stages and a clean kitchen towel for when the pitas are resting after shaping.
Equipment
- Stainless steel pan, cast iron skillet, or non-stick pan:
I personally prefer using stainless steel because it heats evenly and provides great results at medium heat. A cast iron pan works great, but as it retains heat longer if you get it too hot, you will have to allow it time to cool. But as always, for a no-fuss option, a non-stick pan. - Optional: Stand mixer
While you don’t need a mixer for this recipe, using a stand mixer with a dough hook can make kneading much easier. Just set it to a low speed to start and gradually turn it to a medium speed if needed.
Step-by-Step Instructions
Follow these simple steps using the images with their corresponding step! If you get stuck, please watch my video for more help!

- Activate the yeast: In a large mixing bowl, stir the warm water, yeast, sugar, and 150 grams of flour. Let it sit for 10-15 minutes until it’s bubbly and foamy—this means the yeast is working its magic!
- Combine the ingredients: Add the Greek yoghurt, olive oil, and salt to the yeast mixture. Stir until everything is well combined and smooth.
- Add the rest of the flour: Slowly incorporate the remaining flour, mixing as you go.
- Knead the dough: Transfer the dough to a clean work surface dusted with a little flour. Knead for about 10 minutes until the pita bread dough feels smooth, stretchy, and elastic. Add extra flour as needed.

- First rise: Place the dough ball in a large bowl that has been lightly oiled, cover it with plastic wrap, and let it rise in a warm spot for 1.5 to 2 hours or until it has doubled in size.
- Shape the dough: On your floured work surface, gently punch down the risen dough to release the air, then divide it into 8 equal pieces of dough and roll each into a ball. Cover the dough balls with plastic wrap and give them a second rise for around 10 minutes.
- Roll out the pita dough: Again, on your floured work surface, roll each ball into a 20cm dough circle using a floured rolling pin. Cover the rolled-out pita bread with a kitchen towel while you finish the rest.
- Cook the pitas: Heat your frying pan over medium heat and add a little olive oil, wiping off any excess. Place one pita in the pan, and after about 20 seconds, bubbles should start to form. Flip the pita and cook for 1 minute on the other side, then flip and cook for another minute. Continue flipping until the pita is golden brown, crispy, soft, and fluffy. Remember that cooking times may vary depending on the heat of your pan.
- Keep warm: Remove the cooked pita from the pan and cover it with a clean towel or foil to keep it warm. Continue cooking the remaining pitas.

Top Tips
Here are a few tips to help you make the perfect Greek-style pita bread every time:
- Don’t over-flour: Adding too much flour can toughen the dough and affect its fluffiness. It’s always better to add flour gradually while kneading to get the perfect texture. Just remember, it's easier to add flour than liquids!
- Monitor the heat: Keeping a steadily hot pan is key! But you want to make sure that you don't go past medium-high heat. If the pan is too hot, the pitas will burn on the outside while staying raw in the middle. Adjust the heat as needed to maintain that golden colour.
- Use a kitchen scale: A kitchen scale is perfect for dividing the dough into equal pieces, resulting in evenly sized pitas that cook at the same rate.

Serving Suggestions
These soft, fluffy pita breads are so versatile that they’ll elevate any meal! Here are some delicious ways to serve them:
- Stuffed with your favorite fillings: Whether it’s juicy chicken gyros, lamb gyros tender pork souvla (cypriot kontosouvli style), or grilled veggies, these pitas are perfect.
- Dip it in sauces: Tear a piece off and dip it in some creamy tzatziki sauce, taramasalata, hummus or any of your favourite dips for the ultimate appetizer or side.
- Serve with a fresh salad: Pair some flat bread with a traditional Greek salad and extra feta cheese for a simple, satisfying meal.
- Add to your mezze platter: Serve them as part of a mezze spread alongside olives, roasted peppers, Greek yoghurt, and other dips!
Storage
This recipe makes 8 soft, fluffy flatbreads. If you have leftovers or prepare them in advance, store the pita bread in an airtight bag at room temperature for up to 3 days. When you're ready to eat, simply warm them in the oven or pan-fry for a couple of minutes to bring back that fresh, soft texture.
Freezing
Allow the pita bread to cool completely before freezing. Once cooled, place a sheet of parchment/ baking paper between each pita to prevent sticking, then store them in a zip lock bag.
Be sure to press out as much air as possible. The pitas can be frozen for up to 3 months.
When you're ready to enjoy, these can actually be reheated straight from frozen in the oven.

FAQ
Here are a few common questions to help you out:
Yes, you can! All-purpose flour will still yield great results, though it may be slightly less chewy than bread flour.
Absolutely! You can even divide the dough into your 8 small balls, cover them, and refrigerate. Allow the second rise to happen overnight, and simply bring the dough to room temperature before cooking the pitas.
No problem! It will still taste amazing if it’s golden on both sides. As you keep practicing, you’ll find the sweet spot with your pan and cooking technique, and soon you’ll get those puffy pitas almost every time!
You can place the dough in the oven with the light on, creating a warm environment without turning the oven on. Just make sure the oven stays off.
I hope that once you try this, you’ll think it’s the best homemade pita bread recipe, just like I do! I’d love to hear how it went for you and whether you had any tips or questions along the way. Please leave a comment below, and don’t forget to share this recipe with your friends!
📖 Recipe

Easy Homemade Greek Pita Bread Recipe (Fluffy)
Ingredients
- 650 grams Bread flour (high protien) 150 grams for yeast, 500 grams for dough
- 1 tablespoon Sugar
- 250 ml Lukewarm water
- 1 Packet dry active yeast 7 grams
- 1 teaspoon Salt
- 50 grams Olive oil for dough
- 250 grams Greek yoghurt room pemperature
- 1 tablespoon Olive oil for proofing bowl
Instructions
- Activate the yeast: In a large mixing bowl, combine the lukewarm water, yeast, sugar, and 150 grams of flour. Stir until smooth, then let it sit for 10-15 minutes until it becomes foamy, indicating the yeast is active.
- Mix the dough: Add the olive oil, salt, and Greek yogurt to the yeast mixture. Stir well to combine.
- Add flour gradually: Gradually add the remaining flour, mixing as you go. Since every flour is different, add it slowly until the dough forms, ensuring it's not too dry or too wet.
- Knead the dough: Once the dough comes together and become sticky, dust your work surface with flour and transfer the dough. Knead for about 10 minutes, adding more flour as needed.
- Perfect dough texture: Continue kneading until the dough is soft, smooth, and slightly sticky but not sticking to your hands or the bench. The dough should be elastic and smooth.
- First rise: Lightly oil a clean bowl. Place the dough in the bowl, turn it to coat with oil, and cover with a clean kitchen towel or plastic wrap. Let it rise in a warm place until it doubles in size, which can take about 1.5 to 2 hours. Alternatively, place the bowl in the oven with the light on (ensure the oven is off).
- Shape the dough: Dust your work surface with flour again and gently deflate the dough. Divide it into 8 equal pieces and shape them into balls. Cover with a towel and let them rest for 10 minutes.
- Roll out the pitas: On your floured work surface, take one dough ball and press it into a circular shape with your hands. Using a rolling pin, roll it out into a circle about 20 cm wide. Repeat with the remaining dough balls, covering the pitas with a towel as you go. Add more flour if needed to prevent sticking.
- Cook the pitas: Heat a pan over medium heat and add a little olive oil, wiping off any excess. Place one pita in the pan, and after about 20 seconds, flip it. Cook for 1 minute on the other side, then flip again and cook for another minute. Continue flipping until the pita is golden brown, crispy, and still soft and fluffy.
- Keep warm: Remove the cooked pita from the pan and cover it with a clean kitchen towel or foil to keep it warm. Continue cooking the remaining pitas.
Video
Notes
- If the dough is too sticky while kneading, don’t hesitate to add more flour. There’s nothing wrong with adding more flour as needed. It’s easier to add more flour than to adjust with liquid. As long as the dough ends up smooth and elastic, your pitas will turn out perfect.
- Cooking temperature is key: If you notice your pan smoking or the oil starts to burn, lower the heat immediately. Otherwise, the pitas will burn on the outside but remain uncooked in the middle. Keep the temperature moderate to ensure the pitas cook evenly.


Angelos Kenos says
Parakalo WHY WHY WHY did you not teach me this sooner and save me $$ driving to stores to buy their stale versions. YOUR bread is presidential.
Nikolopaa says
Haha, thank you re Angelo! So glad you love the pita bread and happy to save you the trips and the $$ now 😉
Kathy says
There's an error in your recipe. 1Tbsp salt should be 1 tsp salt, and the 1 Tbsp if sugar is missing.The video states the correct amounts.
I tried this recipe a few days ago. The pitas were delicious and fluffy. They didn't puff up for me in the fry pan so I added an extra flip and about 20s to be sure they were cooked through. Thanks for all of your authentic recipes!
Nikolopaa says
Thanks so much for pointing that out! 🙏 I've updated the recipe with the correct amount now. So glad the pitas turned out delicious and fluffy for you! Appreciate your support and happy cooking!
Maria says
Hi,
I want to use this recipe but make a double quantity. You say use 7g yeast plus 150g flour for 1 quantity, do I multiply these numbers by 2 or 3 depending on whether I do double or treble.? Thank you very much.
Maria
Nikolopaa says
Hi Maria 😊
Yes, that's correct! And the yeast is 14 grams for double and 21 grams for triple. For double, the total flour is 1200 grams, and from that, 300 grams will go in the bowl with the yeast. For triple, the total is 1800 grams, with 450 grams going into the yeast mix. So, the 300 grams (for double) and 450 grams (for triple) are part of the total flour amount, not extra.
Also, especially for such a large batch, I’d really recommend making sure your yogurt is well-drained. And don’t forget some extra flour for dusting, and to use bread flour for best results!
It might be worth doing a test run with a regular amount first to make sure everything goes smoothly before scaling up to a big batch. 😊
Hope that helps! Let me know how it goes!
Sal says
Thanks Niko. This is the absolute bestest pita bread ever. Well worth the effort. And thanks for the laugh, a fabulous memory of Con the Fruiterer from the Comedy Company 😍 for those of us who are old enough to know who he is. Cheers and keep up the great recipes. I am looking forward to trying your Tsoureki, I’ve made a few, still yet to find one as good as my Greek friends Yiayias one. I may not be Greek, but I love Greek food and I love cooking X Sal
Nikolopaa says
No worries Sal! Thanks for the comment, kind words, and glad you enjoy the humour 🙂 Yes Con was a legend! Will keep the recipes coming and hopefully my tsoureki lives up to your friends Yiayias 🙏 Food is a universal language we can all enjoy! Happy cooking! ❤️
aaron says
How much sugar? Not in the recipe
Nikolopaa says
Hey Aaron! I apologise, I have fixed it now. It was 1 tablespoon 🙏
JSR says
My family loved this! We went to Santorini a few months ago and miss the delicious food. So I attempted to try and bring back a little of the island at home. I Added chicken, onions, lettuce, tomatoes and tzatziki… came out delicious !
Nikolopaa says
Thanks heaps! 🙏 So glad you and your family loved it! Your gyros sound delicious and perfect for bringing back those Santorini vibes!
Maria says
Hi, you give quantities for double and treble the recipe, does that mean it should be 14g yeast and 300 grams flour for double and 21g yeast and 450g flour for treble?
Thanks very much.
Konstantinos says
i did it and itsexactly how he makes it perfect delicious thanks
Nikolopaa says
Hi Konstantinos 😊
Thank you so much! I’m really glad to hear it turned out perfect and delicious for you. Thanks for letting me know, and I hope you had a great weekend!
Ingrid says
Hi Niko,
Can these be made the day before or frozen for later, and if so, how do you heat them up so they’ll be as good as fresh?
Nikolopaa says
Hi Ingrid! Yes absolutely you can make these the day before, and they can be frozen. It's not going to be as good as if it was fresh but will still be beautiful 🙂
If your heating from the fridge just do it the same way, but they will warm up quicker. If frozen, you can let them thaw and then again put then in the pan and heat them up or you can put them in the oven if you prefer!
Susan Fotos says
I have tried many recipes… this one is by far the best! Wonderful flavor and texture. Thank you!!
Nikolopaa says
Thanks heaps Susan! Happy to hear you enjoyed the recipe 🙏 Theres nothing better then homemade pita bread!
Elizabeth says
Hello Niko,
I have been making ALL your recipes and they are simply delicious, easy and no fuss ingredients. The bread is now a staple in my house. I make a big batch and freeze the dough in portions. I just take out as many as I need on the day and it works perfectly. (defrost it first for a while). My sons eats this pita with everything. Thank you for your funny videos and recipes. Keep it going. You are the best.
Lots of hugs
from Sweden
Nikolopaa says
That’s awesome to hear! Love that you’ve been making all the recipes and that the pita is now a staple in your house 🙏 Smart move freezing the dough in portions, makes it super easy. Big shoutout to your son for being a proper pita lover too haha! Appreciate the support and for enjoying the videos! Sending my love right back to Sweden ❤️
Μερσινα says
My Spartan husband said these were the best pitas he’s had (outside of Greece)! Love your recipes and your fun personality!
Nikolopaa says
Haha love that 🙏 Tell your husband I'm honoured and glad these pitas passed the Spartan test!