
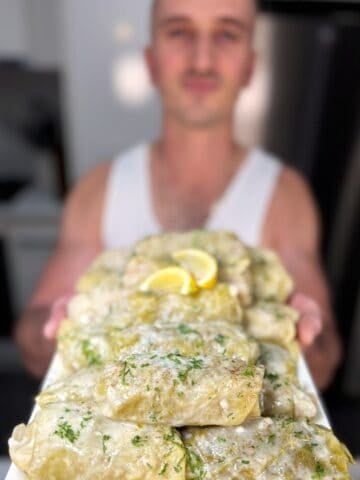
Here’s a recipe for flaky, golden-delicious Tiropitakia, filled with rich, creamy cheese and brightened up with fresh mint.
These crunchy Greek cheese triangles are a crowd-pleasing meze that is so simple to make.

Whip up a batch and freeze them in ahead of your next party. If you love working with filo pastry, you need to check out my Spanakopita spiral!
What are Tiropitakia?
Tiropitakia are baked filo pastry triangles rolled up and filled with various cheeses. This tiropitakia recipe is more of a Cypriot style, with feta cheese as the prominent cheese, along with haloumi and anari. Fresh mint gets added and cuts through the richness of the cheese and buttery filo.
Watch the short video tutorial

Why you’ll love these filo cheese triangles
- A great make-ahead item: You can make a big batch of these and freeze them unbaked. Remember to thaw them overnight.
- Vegetarian option: Perfect for your non-meat eater guests.
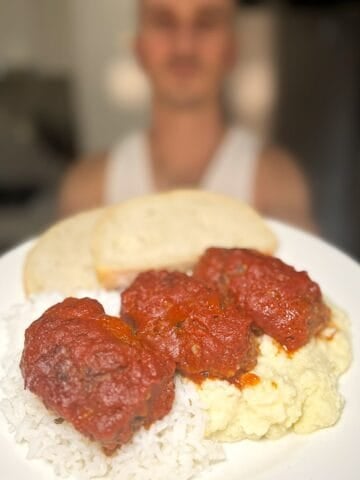
- Party-pleasers: Everyone’s going to love these. From kids to grandmothers, they’ll be a hit, trust me. Pair them with other crowd-favourites like Cypriot meatballs (Keftedes) for a perfect addition to any spread.
- Easy to make: No great skills here; the main thing is to keep an eye on your filo so that it doesn’t dry out.

Ingredients for Tiropitakia
- Haloumi: Be sure to pat the Halloumi dry before using it to remove excess moisture.
- Greek feta cheese: Greek Feta cheese adds a rich and creamy flavor to the filling.
- Ricotta cheese: I use Anari in my recipe. It complements the other cheeses by adding a creamy and mildly sweet element.
- Fresh mint: This adds a burst of freshness and balances the richness of the cheeses.
- Black pepper: Ground black pepper provides a subtle but important hint of spiciness to balance the creamy cheese flavors.
- Eggs: These serve as a binding agent in the filling, helping to hold the cheeses and mint together.
- Filo pastry: Filo pastry, also known as phyllo pastry, is a thin and flaky dough that's ideal for making Greek cheese pies.
- Unsalted butter: Unsalted butter is used to brush the layers of filo pastry, giving them a golden and crispy texture when baked.
Optional
Sesame seeds to sprinkle on top


Top tips for making Tiropitakia
- Thawing your filo pastry. If your pastry is frozen, I recommend thawing it overnight in the fridge (not at room temperature) to make it workable. You can take it out of the refrigerator about 30-40 minutes before working with it.
- Handling your filo pastry. Handle it gently, as it can be delicate and prone to tearing. Keep it covered with a damp cloth to prevent drying out while working with it.
- Filling. When making a tiropitakia recipe, be mindful of the salt content in the cheeses, especially the Halloumi and Feta. Taste the filling before adding additional salt, as the cheeses may already have enough.

Variations of Tiropitakia
- Mixed herbs. Add different herbs, like a mix of dill, chives, and thyme, into the cheese filling.
- Mushroom and cheese. Sautéed mushrooms, such as cremini or portobello, mixed in with the cheeses, is delicious.
- Spiced tiropitakia. Add a pinch of ground nutmeg, paprika, or cayenne pepper to the cheese mixture for a subtle, aromatic kick.
- Tiropitakia cups. Instead of traditional triangle or square shapes, use mini filo cups and bake in the same filling.
- Mini tiropitakia bites. Make smaller, bite-sized cheese triangles, by cutting the filo dough into smaller squares and folding them into mini triangles.
- Sweet tiropitakia. Experiment with sweet variations by using sweetened Ricotta cheese, honey, and cinnamon for the filling and dusting the pastries with powdered sugar.

📖 Recipe

Tiropitakia Greek Cheese Triangles
If you are looking for a crowd pleasing mezze to serve at your next event, then look no further than these delicious, crunchy cheese triangles.
Ingredients
- 600 grams Haloumi
- 600 grams Feta Cheese (Greek)
- 600 grams Ricotta Cheese (I use Anari)
- 1 bunch Fresh Mint (Approx 100 grams)
- ½ teaspoon Black Pepper (Ground)
- 6 eggs
- 2 Filo Pastry (Packets)
- 400 grams Butter (Unsalted)
Instructions
- Grate the haloumi and add to a large bowl.
- Crumble the Feta and Anari to the bowl.
- Finely chop the mint and add to the bowl.
- Add in the ground pepper.
- Whisk 6 eggs and add to the bowl.
- With your hands, mix everything together until it’s all well combined.
- Melt the butter and pre-heat the oven to 160° celcius.
- Cut your fillo roll while it is still in the packet, into 3 even pieces. Take one away and cover the rest with a damp towel so it does not dry out.
- Unroll the section you took out and grab one sheet.
- To the sheet, add a thin layer of butter. Then add another sheet over the top.
- Butter the top of the second sheet and place a tablespoon full of the cheese filling to the top of the fillo.
- Fold the section with the cheese filling over, to make a triangle. Then fold forward, then into a triangle, forward, triangle, until it’s a complete, filled triangle.
- Repeat step 12 until all are made and place onto a baking tray*
- With the left-over butter, brush the tops of the tiropitas.
- Place in the oven until golden brown (roughly 20 minutes).
- Once they are ready, enjoy! Just be careful not to burn your tongue!
- If you are making these to freeze for a later date, at step 13, place into a airtight container, layering with parchment paper in between in layer so you can easily remove them when the time comes.
Video
Nutrition
Calories: 172kcalCarbohydrates: 6gProtein: 7gFat: 13gSaturated Fat: 8gPolyunsaturated Fat: 1gMonounsaturated Fat: 4gTrans Fat: 0.2gCholesterol: 49mgSodium: 389mgPotassium: 35mgFiber: 0.2gSugar: 0.1gVitamin A: 305IUVitamin C: 0.02mgCalcium: 191mgIron: 1mg
Tried this recipe?Post it on Instagram and tag me @nikolopaa
Related
Looking for other recipes like this? Try these:


Leave a Reply